
A pipe saddle joint is a specialized intersection where a "branch" tube meets a "main" tube by wrapping around its curvature. Unlike a simple straight cut, the saddle creates a compound curve that matches the surface of the main tube exactly.
This joint type is essential in:
- Roll cages & chassis nodes
- Off-road and race vehicle fabrication
- Structural handrails
- Industrial piping
- Lightweight tubular frames
In this article, we'll break down the geometry, the different saddle types, how angles affect fitment, and how templates help you get perfect joints with minimal training.
New to pipe coping? Start with our complete guide to understanding pipe coping first.
What Makes a Saddle Joint Unique?
Most joints in fabrication are flat-to-flat or flat-to-round.
A saddle joint is round-to-round, which means the cut must conform to a curved surface in two dimensions simultaneously:
- The wrap around the main tube
- The profile of the intersecting angle
This creates a "fishmouth" shape — a true geometric projection, not a simple arc.
The Geometry Behind a Saddle Joint
A saddle joint's profile is generated by projecting the circular end of the branch tube onto the curved surface of the main tube.
This results in:
1. A Non-Circular Curve
The cut profile is not a circle, ellipse, or simple arc — it is a true intersection curve between two cylinders.
2. Angle-Dependent Shape
As the intersection angle changes, the curve becomes:
- More elongated at shallow angles
- More symmetric at 90°
- Sharper at the sides as angle decreases
3. Variable Contact Patch
A perfect saddle maximizes the length of the weldable contact area, distributing load more evenly.
Saddle Joint Types (With Engineering Meaning)
1️⃣ True 90° Saddle
- Perfectly symmetric
- Largest contact patch
- Ideal for load-bearing nodes
- Common in roll cage vertical-to-horizontal connections
2️⃣ Angled Saddle (10°–80°)
- Curve becomes elongated
- Critical for diagonal bracing
- Reduces weld surface area as angle decreases
- Often used in complex cage geometry (A-pillar to dash bar, etc.)
3️⃣ Different-Diameter Saddle
Occurs when the branch tube and main tube are not the same size.
Effects:
- The curve shifts away from symmetry
- High-stress points form near smallest-radius contact
- Often found in furniture, industrial piping, and race chassis transitions
4️⃣ Offset Saddle
The branch tube intersects the main tube off center, creating:
- Uneven weld thickness
- Directional strength considerations
- Specialized use in piping and bracing
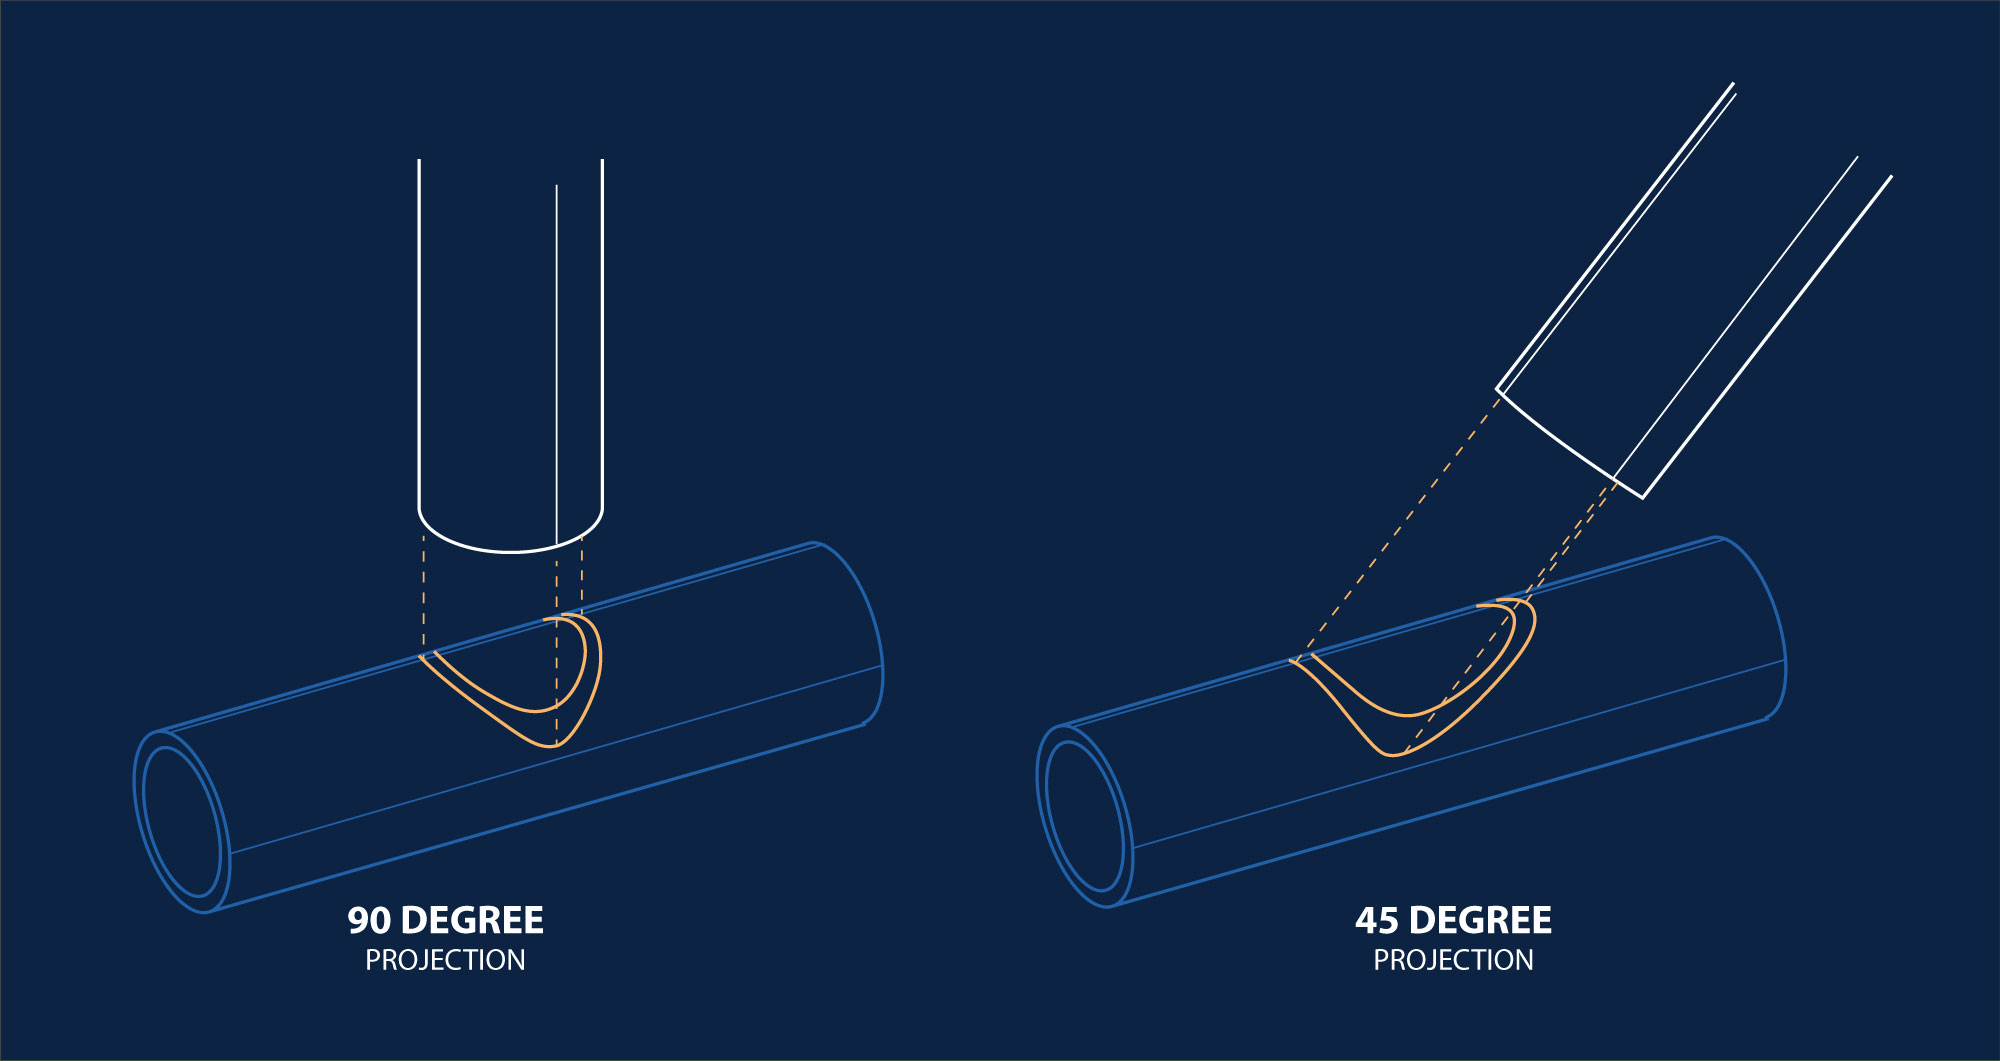
How Angle Affects Strength & Fitment
At 90°
- Maximum contact area
- Easiest to weld
- Strongest overall joint
- Best for impact load paths (ex: roll cage nodes)
At 45°
- Smaller contact patch
- Higher stress at edges
- Requires cleaner fitment
- Used heavily in diagonal braces
Building a roll cage? Check our roll cage tube sizes and notching angles guide for sizing charts and common angles.
At 10°–30°
- Very elongated profile
- Easy to misalign rotationally
- Requires careful template placement
- Common in structural transitions or bracing where tube direction subtly changes
At Very Shallow Angles (Under 10°)
- Contact patch becomes tiny
- Often replaced with gussets or alternative joint geometry
- Not recommended for critical load paths
Common Saddle Joint Failures (and How to Avoid Them)
1. Point Loading
Occurs when the saddle only contacts in two narrow side areas.
Fix: improve template accuracy + grind evenly.
2. Over-Grinding
Removes too much material and creates gaps.
Fix: leave 0.5–1 mm for final belt sanding.
3. Rotational Misalignment
The branch tube is twisted relative to the intended angle.
Fix: use template rotation reference lines.
4. Different-Diameter Stress Cracks
Uneven contact causes welds to take directional overload.
Fix: use fillet reinforcement for non-matching diameters.

How Templates Solve These Geometry Problems
A printable template is not just a guide — it's the exact mathematical projection of one cylinder onto another. Templates automatically correct:
- Angle-dependent curve distortion
- Diameter differences
- Symmetry alignment
- Minimum gap variation
- Orientation references
The result is a joint with a near-perfect contact patch, even at challenging angles.
Comparing Template Accuracy vs. Manual Layout
| Challenge | Manual Cutting | FabToolkit Template |
|---|---|---|
| Angle distortion | ❌ High | ✅ Zero |
| Rotational alignment | ❌ Guessing | ✅ Reference lines |
| Different diameters | ❌ Very hard | ✅ Automatic |
| Minimizing gap size | ❌ Inconsistent | ✅ Highly accurate |
| Repeatability | ❌ Low | ✅ High |
Templates remove nearly all geometric guesswork.
Read the Full Guide:
Read the Full Guide: How to Cope Pipe (With Printable Templates) →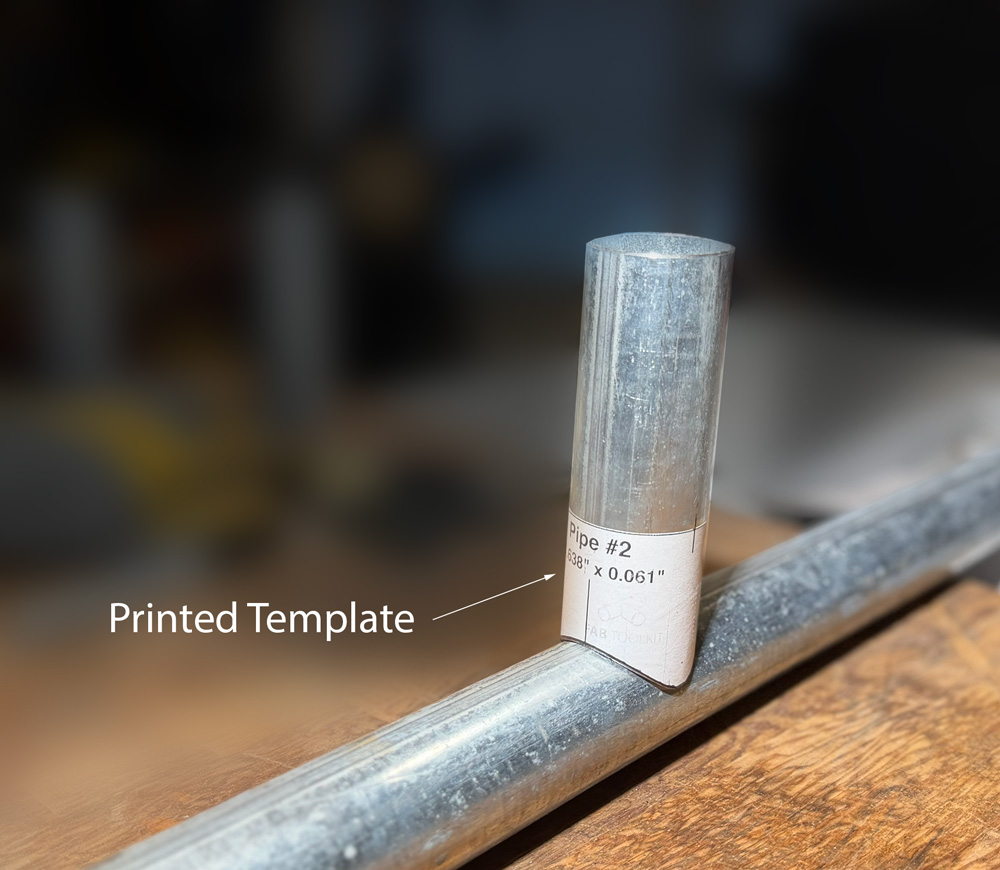
Related Tools & Guides:
- Pipe Coping Template Generator — Generate saddle joint templates
- Pipe Miter Template Generator — For miter joint templates
- Fabricator's Unit Converter — Convert measurements and check pipe sizes
- How to Cope Pipe With Printable Templates
- Understanding Pipe Coping
Ready to Create Perfect Saddle Joints?
Try the FabToolkit Saddle Joint Template Generator — instant and precise.
Get Started Now →